Solving XAMPP MySQL Port Conflict Error

If you’ve encountered an issue where MySQL in XAMPP refuses to work due to a port conflict, afraid not you’re not alone. In this guide, we’ll walk through the steps to identify and resolve the port conflict to get your MySQL server up and running smoothly.
Step 1: Check for Running Ports
The first step is to identify if there’s a port currently in use. Open the Command Prompt on Windows and run as an administrator:
netstat -anb
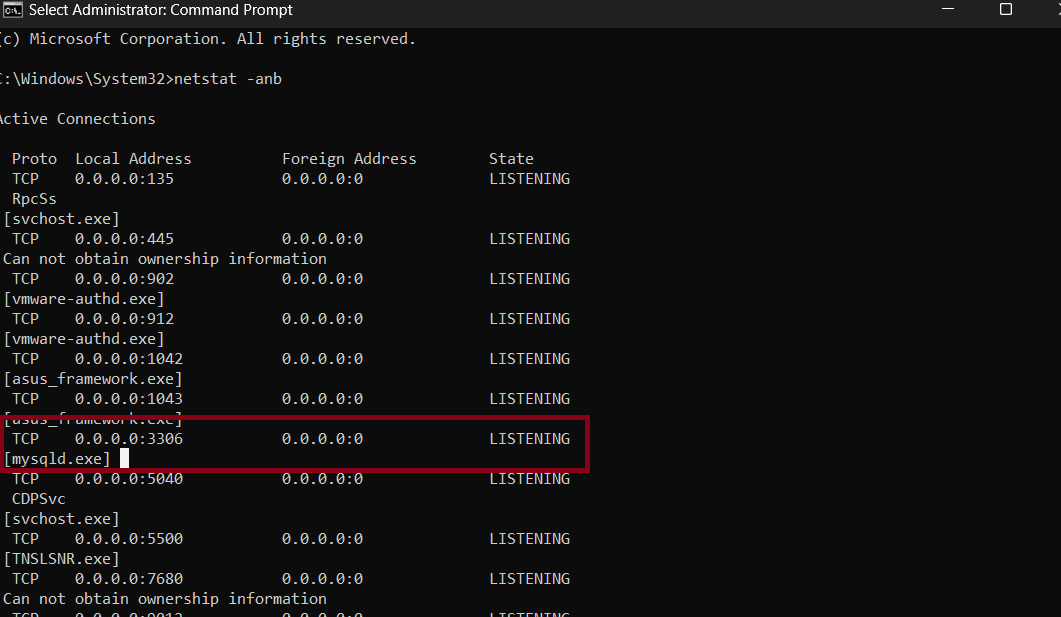
In my computer another mysql service is running in port 3306. So we have to stop the service accordingly.
Step 2: Find and Stop the Conflicting Service
Once you’ve identified the conflicting port, let’s find the service using it. Follow these steps:
- Open the Services manager by pressing
Win + R, typingservices.msc, and hitting Enter.

2. Look for the service associated with the conflicting port.
3. Right-click on the service and select “Stop.”

Step 3: Start XAMPP as Administrator
To ensure changes take effect, start XAMPP as an administrator:
- Right-click on the XAMPP Control Panel icon.
- Select “Run as administrator.”
- Start the MySQL module.

Step 4: Verify Connection
Open a web browser and navigate to http://localhost/phpmyadmin/. Check if you can access the PHPMyAdmin interface without any issues.
By following these steps, you should have successfully resolved the MySQL port conflict issue in XAMPP.
Remember, troubleshooting technical issues can be complex, and it’s essential to understand the changes you make. If problems persist, consider seeking help from forums or consulting XAMPP and MySQL documentation.
Happy coding! 🚀